Instrument Setup
Instrument and Software Set Up
The following *may* be completed beforehand by the ISA, TO, or Instrument Tech on duty. Regardless, whenever you (the observer) are about to use the instrument you should go through these instructions CAREFULLY to make sure the instrument is indeed ready to go. Report any problems to the ISA or TO.
To set up the instrument and work station:
-
- Log into LBTO obs workstation, obs2, using the correct partner account (INAF,LBTB,OSURC,AZ). If observing remotely, use OpenNX (opened from the Applications Menu) to open a desktop on an obs machine on the mountain. Displays and GUI’s for MODS’s should be opened on the obs machine session.
- Open a terminal window and type:
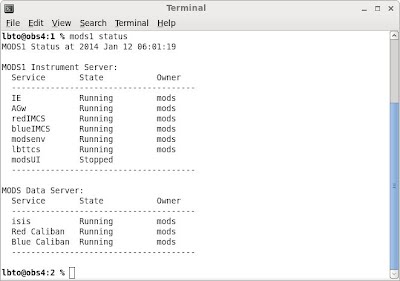
>> mods1 status (for MODS1)
>> mods2 status (for MODS2)
You will see a status panel:
-
- Everything listed but the modsUI (User Interface GUI) should be open and owned by mods. If not, notify the TO, ISA, or ISp and ask them to restart the service. Once all but the GUI are open and owned by mods, proceed.
-
- In the terminal window type:
>> mods1 start gui
to open the MODS Control Panel for MODS1, or type:
>> mods2 start gui
to open the equivalent panel for MODS2.
- In the MODS Control Panel, click on the Setup Icon on the left sidebar to display the MODS Instrument Setup screen.
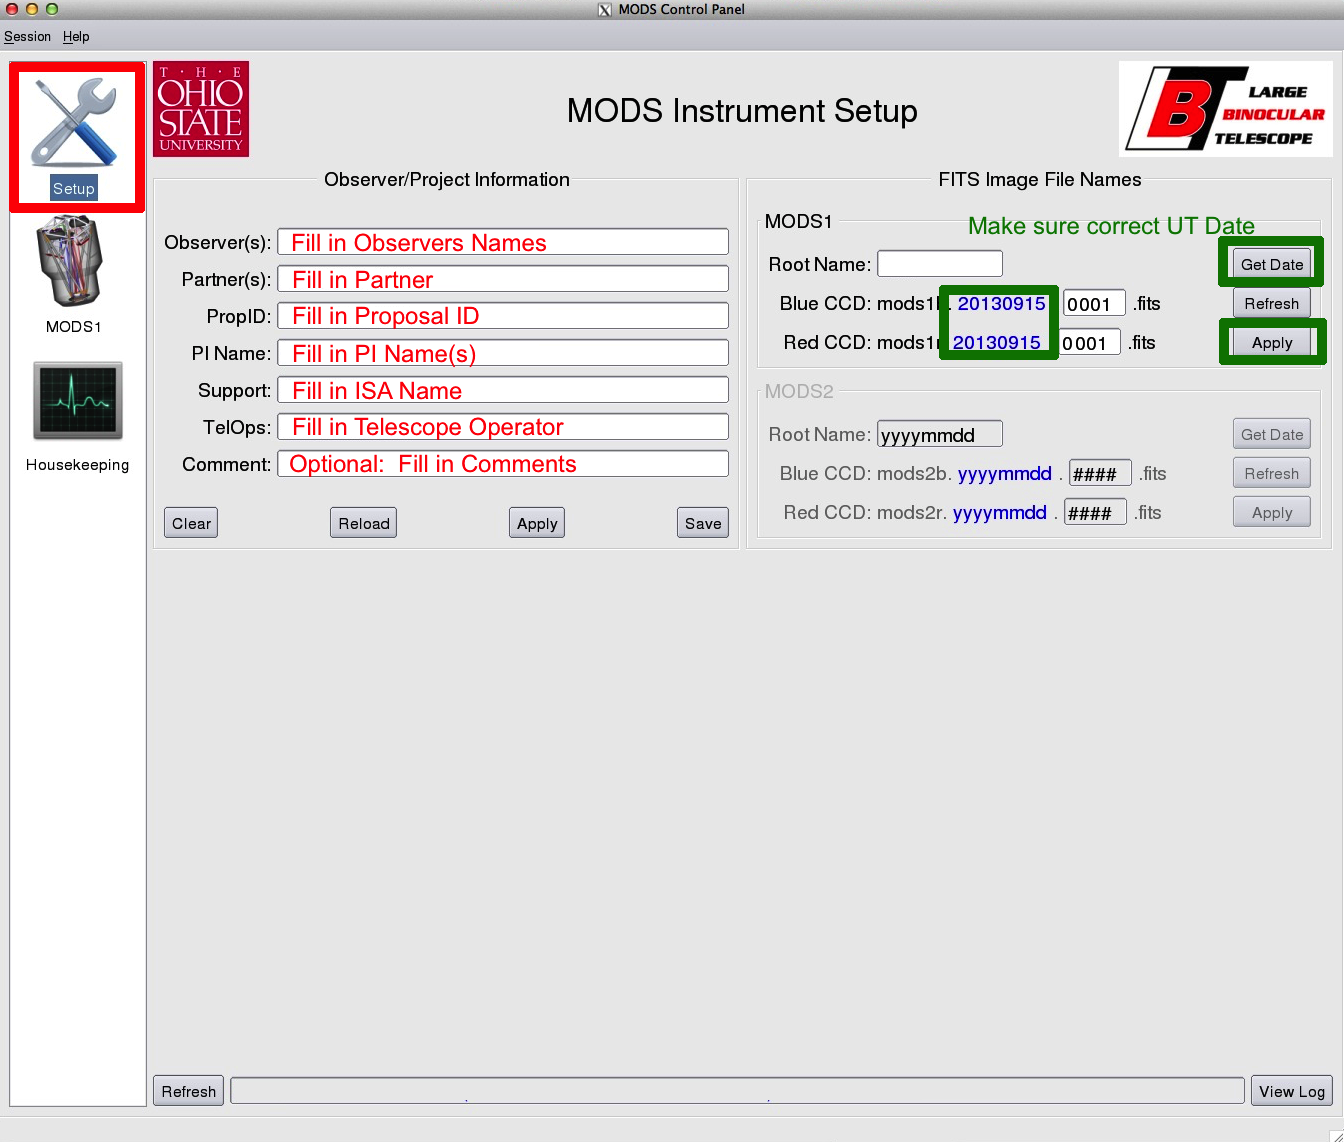
- Click “GetDate” on the right side of the Instrument Setup Screen to update the UT date in the image file names. Make sure it is the correct UT date for the night. If it is early in the afternoon in may still get yesterdays UT. Click “Apply”.
- Check the sequence numbers (i.e. mods1b.20130915.0001.fits) to ensure the numbers are as expected.
NOTE: If you or someone else has taken files earlier during the same UT day, you may have to manually adjust the sequence number to reflect this. When in doubt, check /newdata on a summit machine to verify that the sequence number you are starting with is unique and correct (i.e. if 0003 already exists for mods1r, start with 0004 for mods1r in the setup tab!) - While many scripts will configure the Observer and Project values in this screen automatically it is important to enter default values for data taken “by hand” or for scripts in which it is not specified:
- Observer Names (can be separated by commas and spaces). This goes into headers as the value for the keyword, OBSERVER.
- Enter the Partner Name: OSURC, AZ, INAF, LBTB, LBTO. The name entered here goes into the headers as PARTNER and determines how the data will be archived. (Multiple partners can be listed, separated by commas but no spaces.)
- Enter PropID
- Enter PI Name, Support (SUPPORT), Telescope Operator (TELOPS) and a Comment describing the run.
- Once all the necessary updates have been made, click Apply, then Save. The Partner, PropID and PI Name will be overridden later by the parameters in the Archive: blocks of subsequent MODS observing scripts.
- Open another terminal window and type
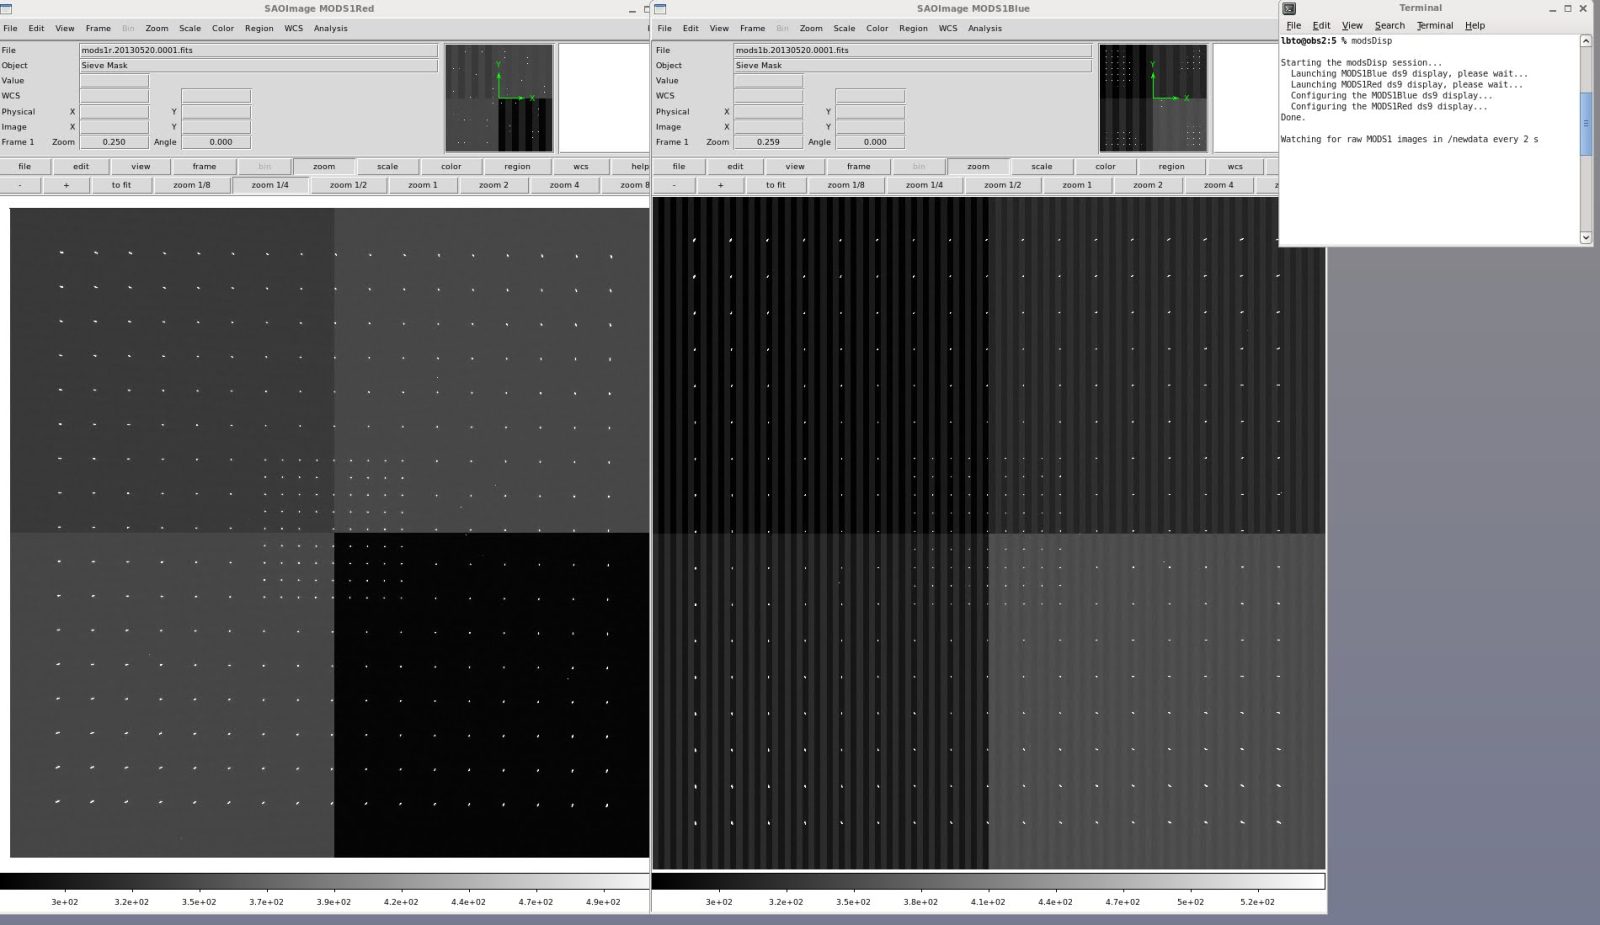
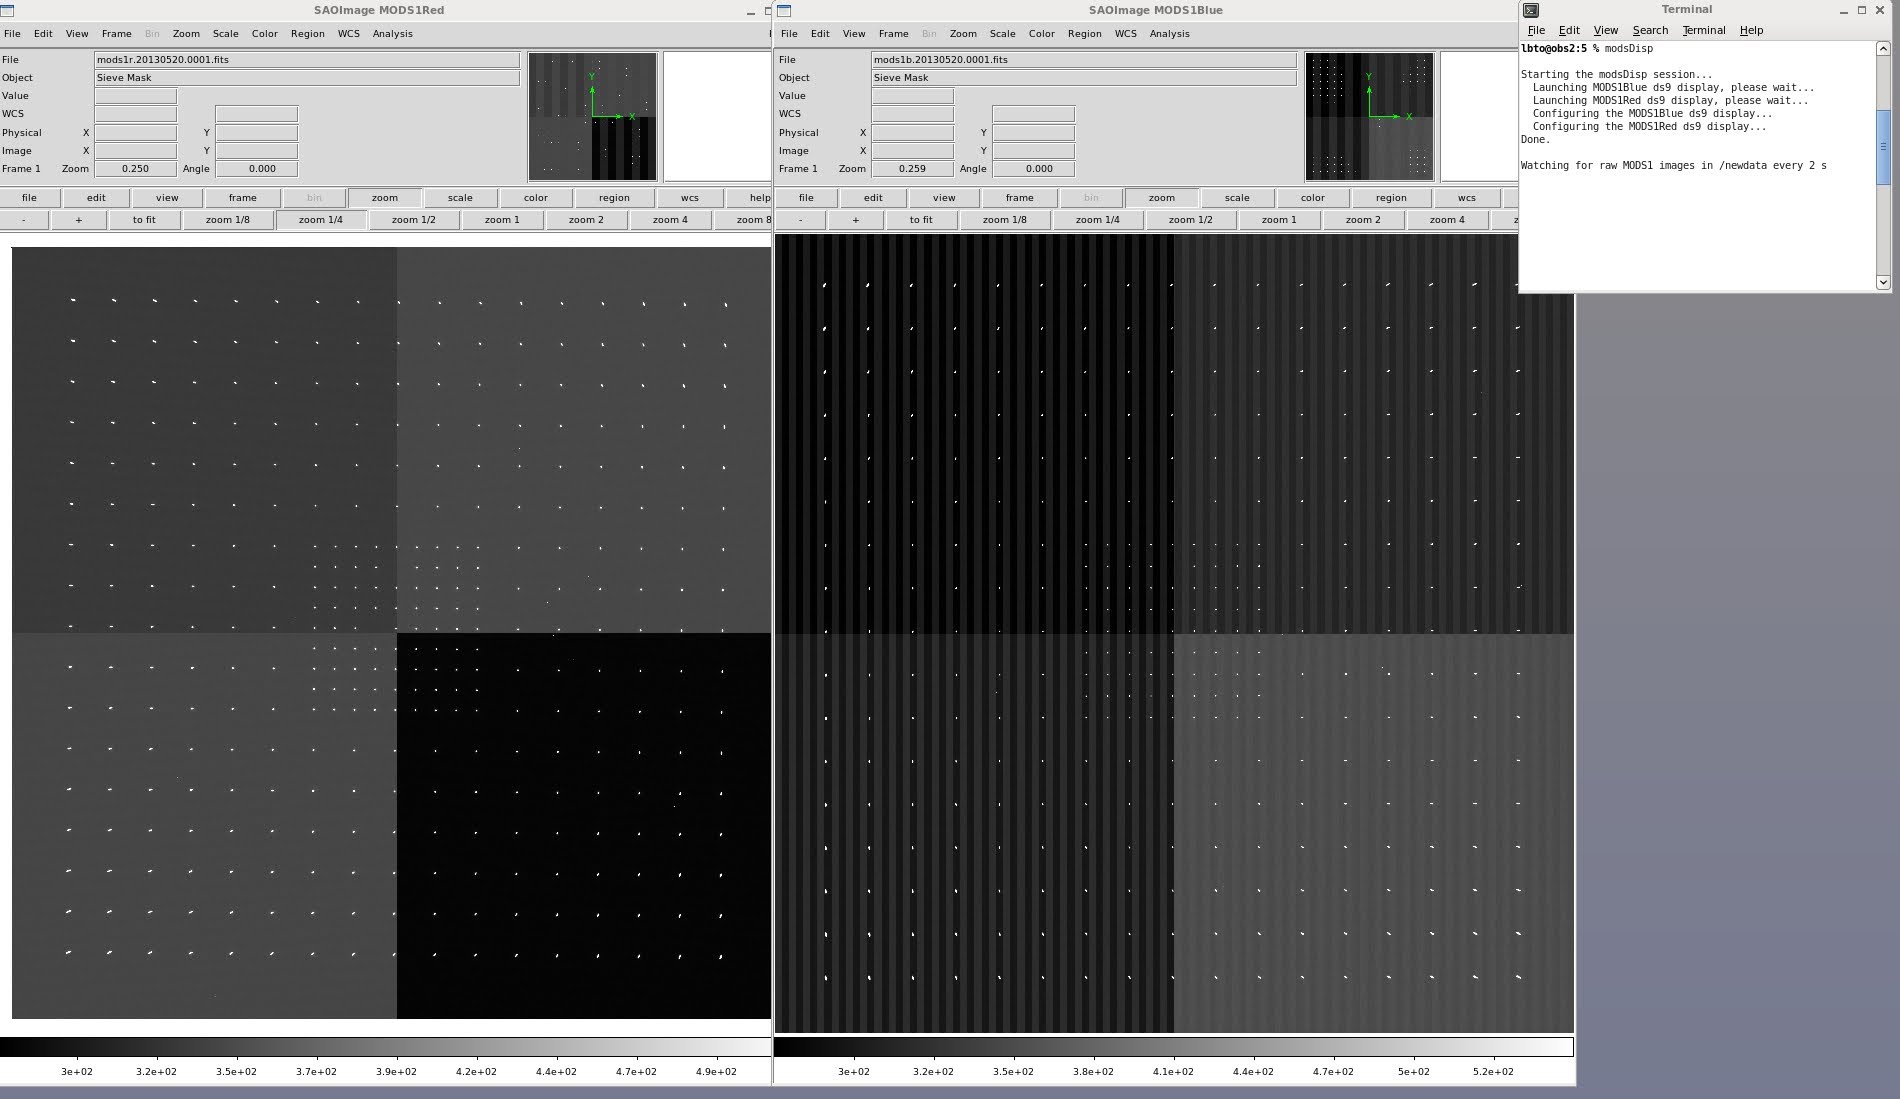
>> modsDisp (for MODS1)
>> mods2Disp (for MODS2)
modsDisp will launch two read-only ds9 windows to display the most recent Blue and Red images, while the terminal window will display a table of the images as they arrive on the /newdata disk.
- In the terminal window type:

-
- Open a terminal and change directories to:
/home/modseng/modsScripts/Support
In this directory are the wake scripts for MODS1 and MODS2:
>> execMODS –mods1 mods1Wake.pro
To wake MODS2, type:
>> execMODS –mods2 mods2Wake.pro
As the script runs, watch for errors, and confirm that wakes up ok.


- Take a test image with mods. Run
>> execMODS –modsN sieveSnap.pro (for monocular, note same script for both MODS)
or
>> execBinoMODS sieveSnap.pro (for Bonocular)The sieveSnap.pro script is also located in the /home/modseng/modsScripts/Support directory.

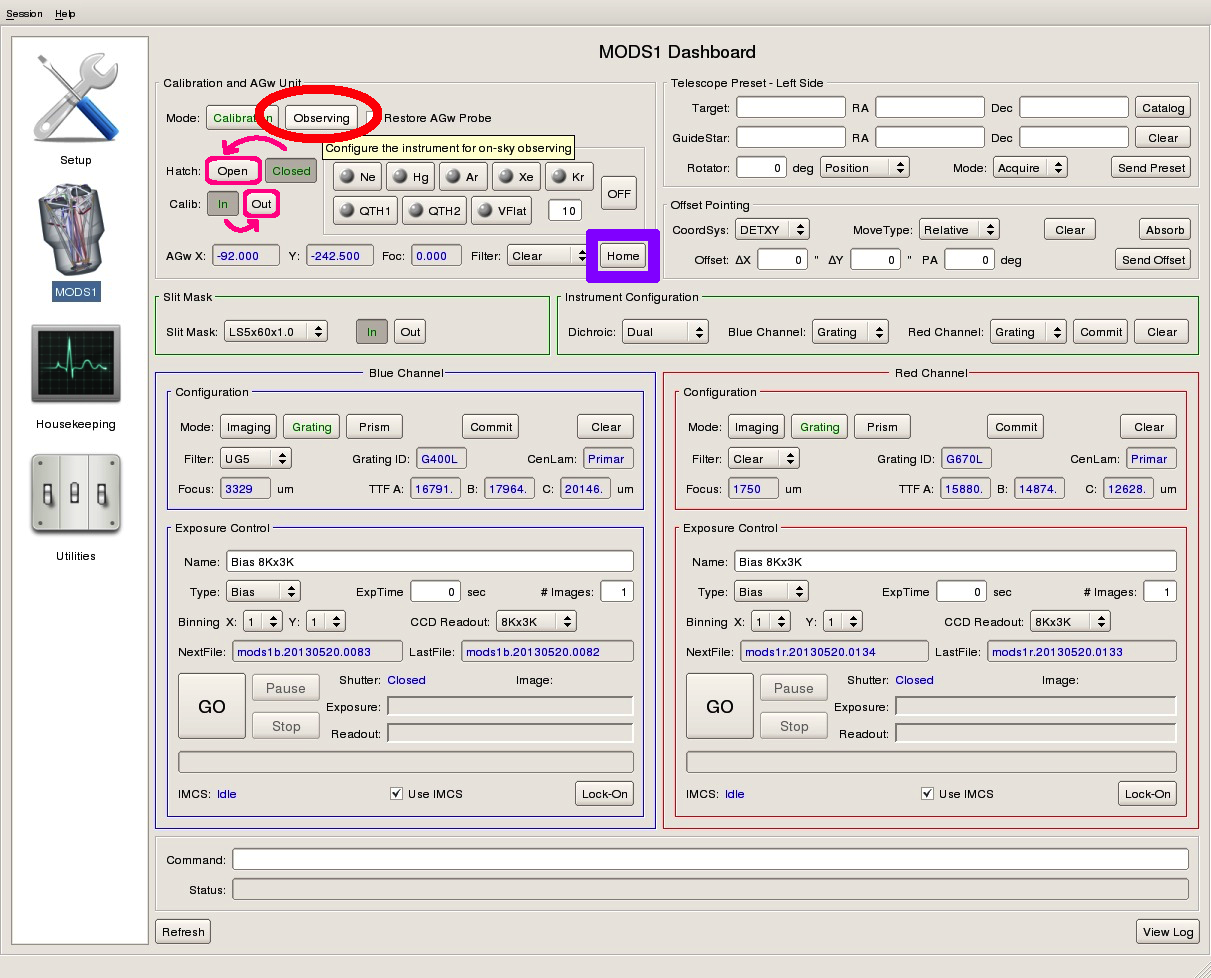
Check that the image displays properly and appears in /newdata. - Put MODS into Observing Mode by selecting the “Observing” button in the upper left of the MODS dashboard in the Calibration and AGw Unit Section of the MODS Control Panel. This will Open the hatch, move the calibration unit out, configuring the instrument for on-sky observing.
- Open a terminal and change directories to:
- Home the guider stage by selecting the “Home” button in the Calibration and AGw Unit Section of the MODS dashboard. If the first preset is sent with the calibration unit in, the guider stage will not initialize correctly and the preset will not move the guide probe. (Once MODS is in observing mode a GCS restart will clear this.)
- Open a terminal. Change directories to the directory containing the observing scripts for the night.
- Open a terminal window in which you will run modsAlign.
- If you are working alone, you should open the modsAlign xterm on your current workstation AFTER ensuring that all other instances of ds9 NOT associated with MODS (i.e. RB_Science or iraf) are closed.
- If you are working with a partner who wishes to run modsAlign, you may choose to open the terminal window on a separate mountain workstation and designate that as the “acquisition station”. Ensure that all other instances of ds9 NOT associated with MODS (i.e. RB_Science or iraf) are closed.
- Regardless of which machine you choose for running modsAlign, you MUST run the command from a writeable directory (i.e. not /newdata or /home). If you are doing MOS, you MUST be in the directory where your mms files are located.
- Open a terminal window to open several telescope monitoring services:
- Type
>> IIFGUI &
to bring up the IIF GUI display.

This GUI will allow you to keep track of the position of the telescope and will help confirm when commands to the mount & mirrors are completed. - In the same terminal and type:
>> GCSGUI left &
for observing with MODS1 and/or
>> GCSGUI right &
for observing with MODS2 to bring up the GCS display GUI.
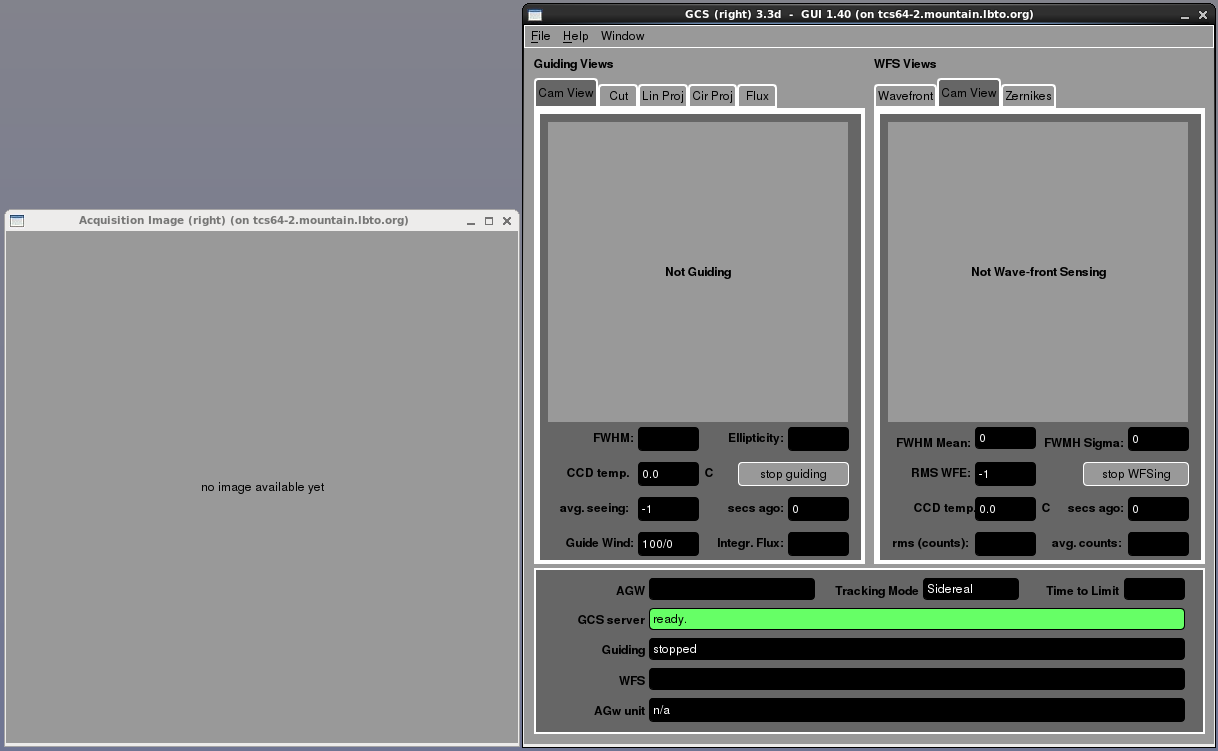
This GUI will show you the the guide stars on both the guider and wavefront sensor and give you a measure of the seeing and collimation. - Open a terminal on and obs machine and type:
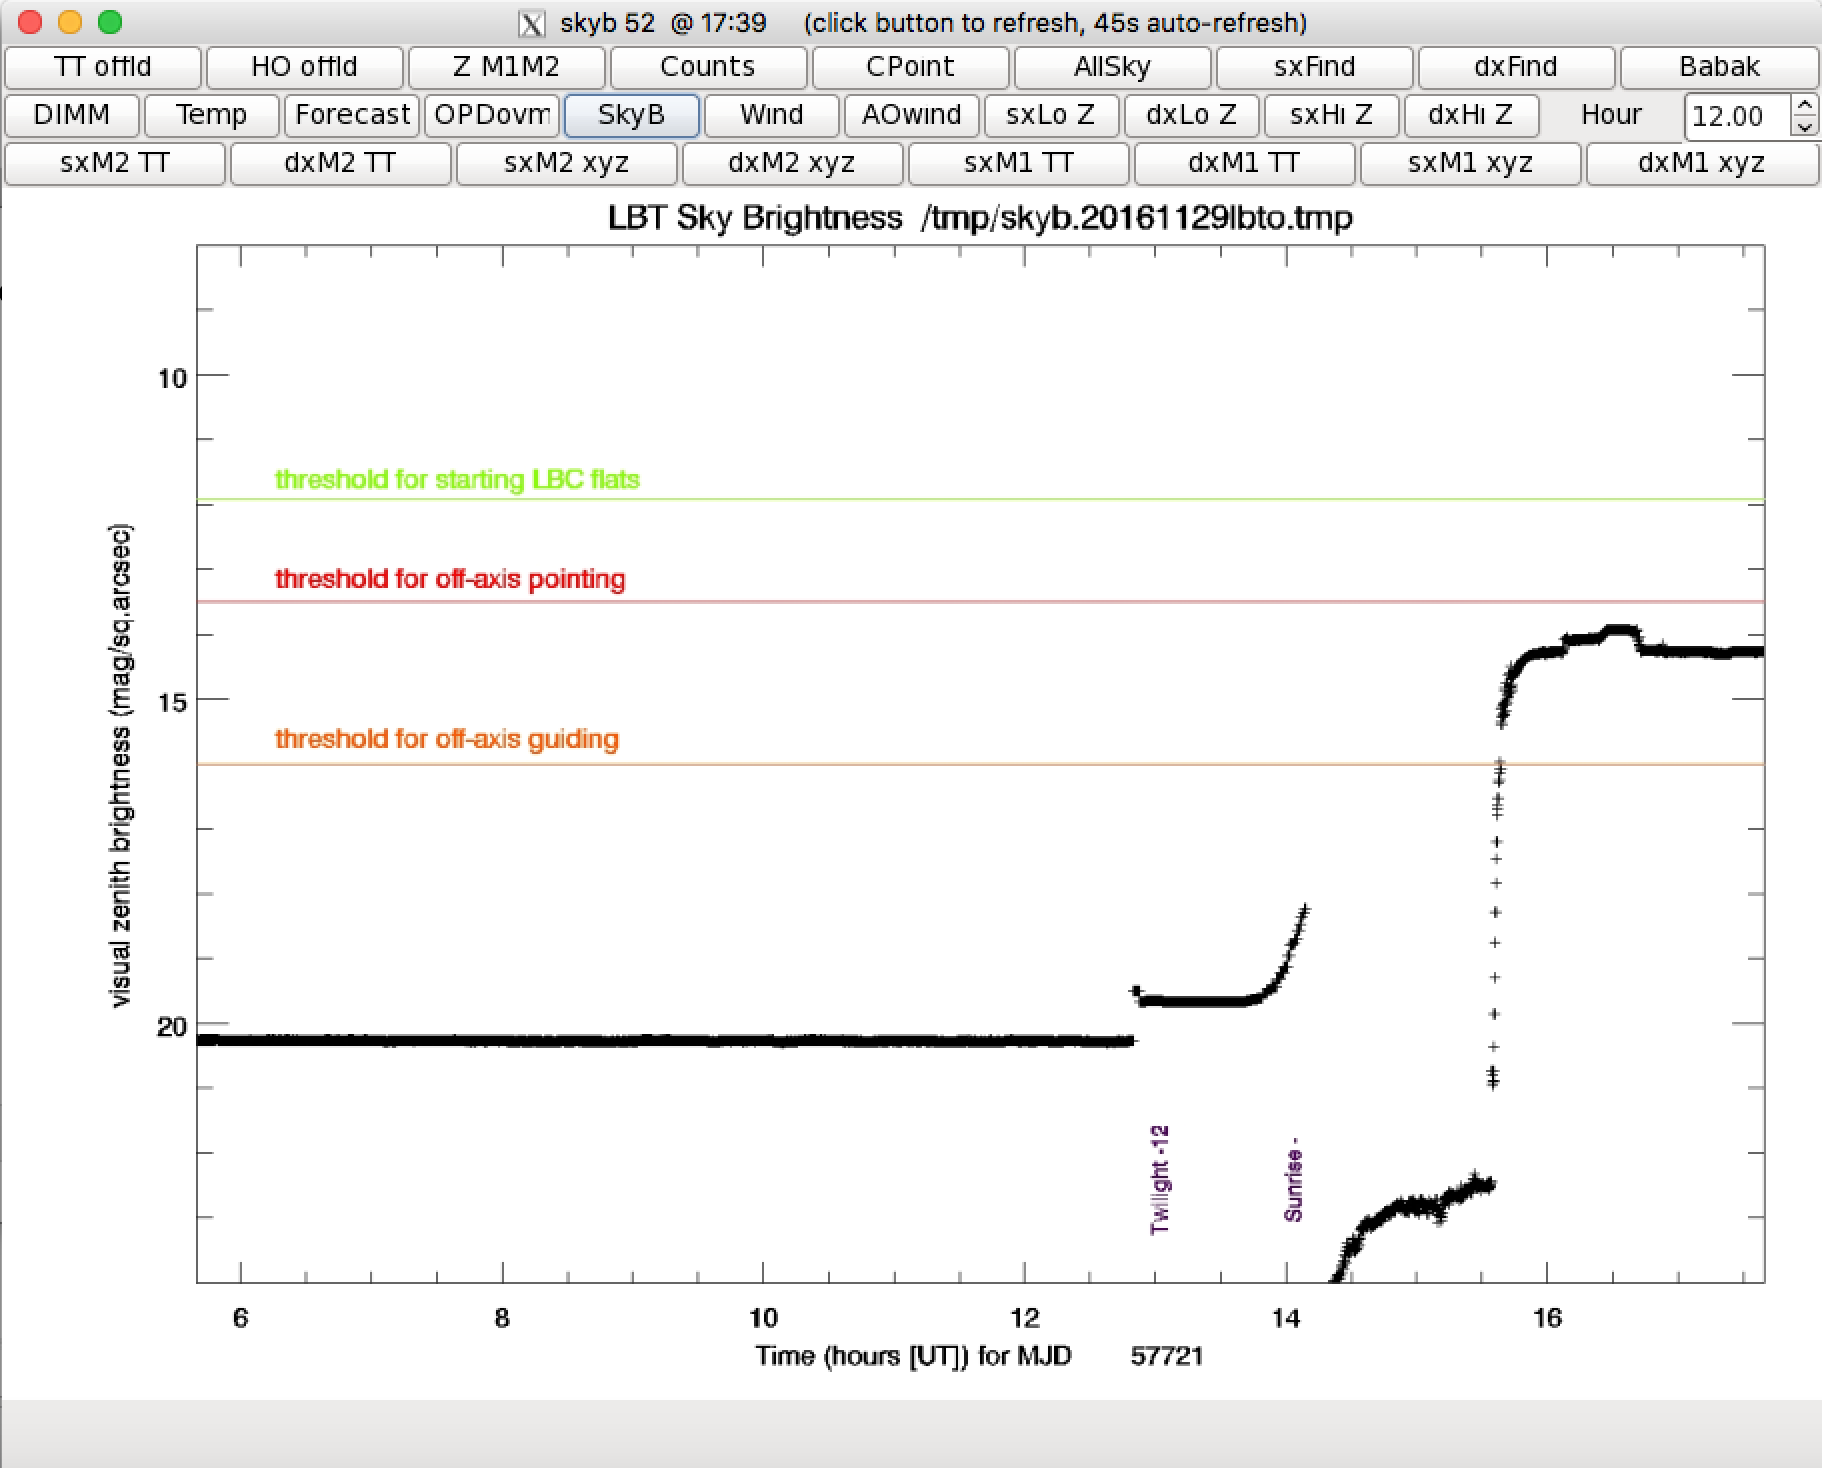
>> LBTplot
to bring up the LBTPlot script.

This only runs on the mountain, so if observing remotely from town open the terminal to the mountain. This tool can be used to: view the guider and see guider FWHM with the “SX(DX) guide” button, to track DIMM seeing (“DIMM” button in middle row), transparency (middle panel; the guide star flux converted to magnitude around r band) and the guide corrections (bottom panel) for the SX(DX) side, finder charts (sxfind and dxfind in top row), etc.
- Type
Pointing and Collimation Check
Provide the OSA with the coordinates of your first target before the start of the night, preferably at or before sunset. Once it is dark enough, they will use the coordinates provided to slew to a nearby bright star to correct pointing and collimation