Target
The Target Element allows users to input targets and guide stars into their programs

When a new observation is created, the telescope targets component is empty and the science program viewer displays a placeholder with RA:00:00:00.00 (HH:MM:SS.s) Dec:00:00:00.0 (DD:MM:SS.s) (J2000) until an object name is given. When online, target coordinates, including proper motions, can be obtained by querying the Simbad database by either pressing Return in the Target Name field, or by clicking on the magnifying glass next to the text box. Proper motions in milli-arcsec/year may be entered into the boxes below the target coordinates. These are also filled in automatically with some Simbad and guide star queries.
The target name should contain alphanumeric symbols and blank spaces only, as some other symbols (e.g., brackets) can be interpreted as commands by the observing system. Note that the only supported coordinate systems are J2000 and Apparent.
Upper Target Panel
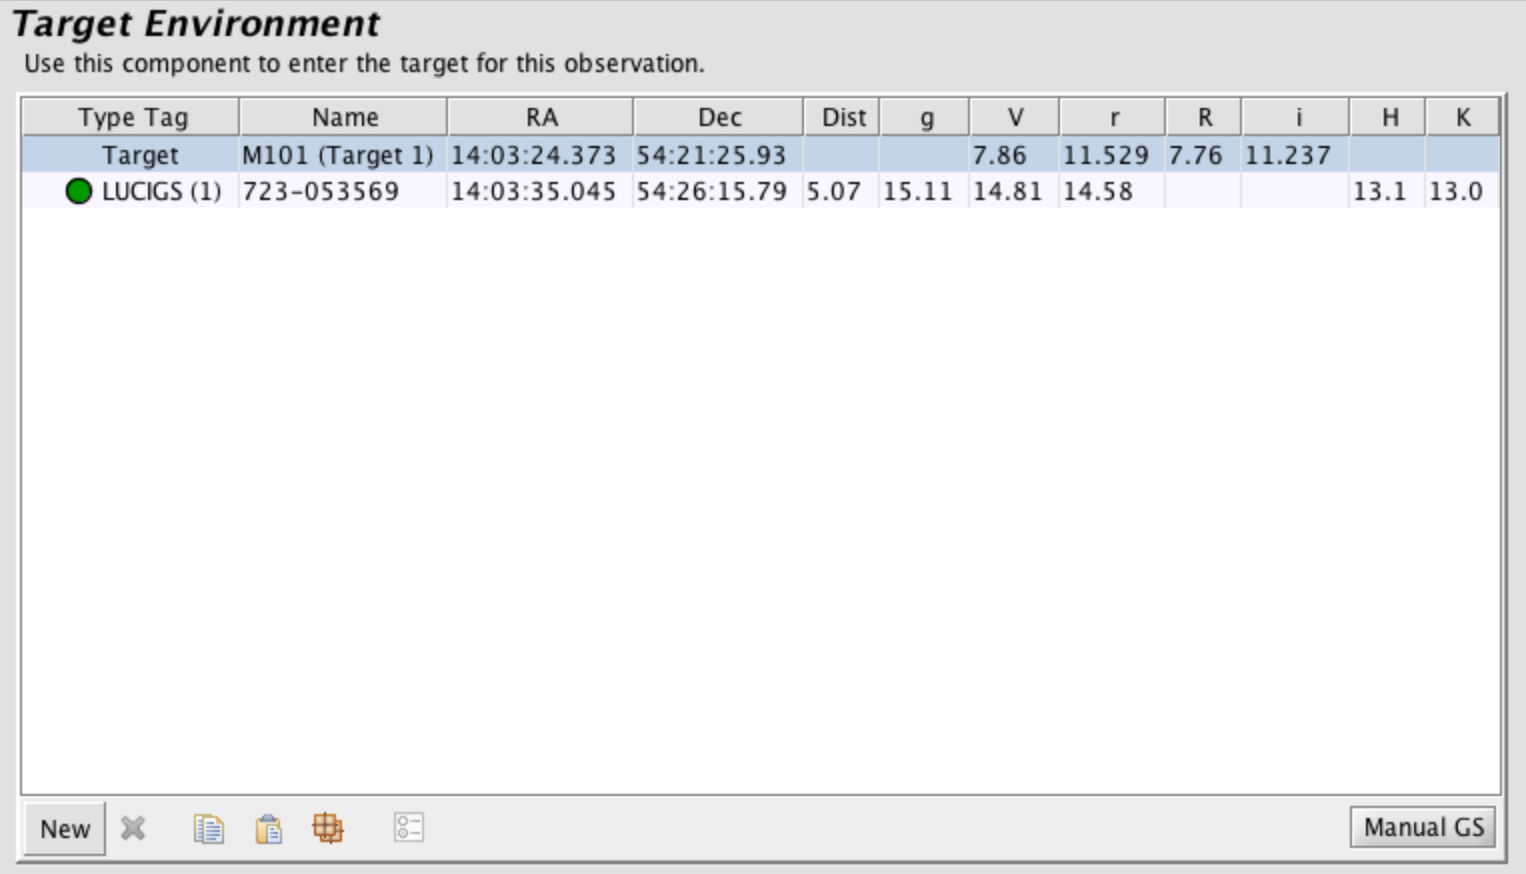
The upper panel displays the Target list. Each object has a Type Tag associating it with the Target position (telescope preset) or one of the instrument specific guide stars. The User tag is not associated with a GS and is normally used for keeping track of blind-offsets to a faint target. If you wish to change the tag type for a particular position, select the item in the target list and choose the new tag type from the pull-down list at the bottom of the top panel. The distance between the base position and the other targets is listed in arcminutes, and all of the known magnitudes are listed for each target (note you may need to use the horizontal scroll-bar to see all the values).
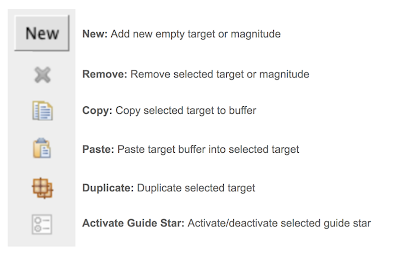
You can add or remove items in the target list (except the base position) using the add/remove/duplicate buttons. Pausing the cursor over one of the buttons will reveal a description of the button’s function. A summary of the buttons is given below:
Targets can be copy/pasted between target components in different observations, including observations in different programs.
The Duplicate button will copy the information of the selected target and copy it to a new line in the table. If the base position is duplicated, then the new target has a User tag. If another type of target is duplicated then the new target has the same kind of tag as the original but the running number is incremented. For example, if target LUCIGS (1) is duplicated then the new target has the tag LUCIGS (2).
The Manual GS button will open the Position Editor (if it is not already open) and then open the Catalog Query Tool for doing manual guide star searches from either the UCAC4, UCAC5, NOMAD, or Gaia catalogs. See more in the Guide Star Selection page.
Lower Target Panel

Target brightness information is entered in the middle panel. This information can be deleted by clicking the red X to the left of the string. Target brightnesses are entered as value; bandpass; system. To manually enter a new brightness, select the bandpass from the pull-down menu to the right of the box labeled “Select” and then enter a value into the box. Additional entries to the table can be added by clicking on the green + below the list. An entry can be deleted by clicking on the appropriate red X. The Brightness table is automatically sorted by wavelength.
The lower target panel also contains two Telescope settings boxes. The first is a text box that allows the user to specify position angle. This box is interactive with the Position Editor, rotating the science chip using the cyan arrow at the top of the FOV will interactively change the value in this box.
The second box is a pull down menu that sets the Rotator Mode and Telescope Mode.
Current options for Telescope Mode include Track, Guide, Active, Adaptive Track, Adaptive, Enhanced Seeing (ESM). Track assumes that only the basic tracking system of the telescope is working; this mode requires no guide star selection, but may only guarantee rough positional stability over relatively short (180s) time frames and will afford not active correction by the optics. Guide mode uses a guide star and camera to keep targets well-positioned on the detector for longer observations. However, in this mode, the optics will perform no active corrections. Active mode, recommended strongly for most seeing limited science observation, ensures both guiding and wavefront sensing; the later allowing the active optics to make corrections. This mode also requires a guide star. Adaptive using the guiding and wavefront sensing, along with the onaxis AO reference star for the SOUL adaptive optics system. This mode is typically used for Diffraction Limited observations. Adaptive Track relies solely on the SOUL adaptive optics system for tracking and collimation. This mode is typically used for ADI observations. Enhanced Seeing (ESM) enables ESM mode which utilized the SOUL adaptive optics system to provide 11 modes of corrections, which include: tip+tilt + focus, astigmatism, coma, trefoil, spherical, and one high order (Z12).
Rotator modes offered are Position and Parallactic. Position enables the field rotator, maintaining the field orientation throughout the observation. This is typically enabled. Parallactic disables the field tracking rotator, enabling pupil tracking imaging (Angular Differential Imaging observations).


