MODS Sequence Iterator
The MODS1 and MODS2 Iterators are identical. These iterators allow users to change the configuration of the instrument and readout to configure more complex observations. The configurable items are:
| Available Sequence Items | Notes | |
|---|---|---|
| FPU Mask | Typically only adjusted during acquisitions. | |
| Blue Filter | Red Filter | |
| Blue Grating | Red Grating | Not typically adjusted in sequence iterator |
| Blue Exposure Time | Red Exposure Time | |
| Blue NExpo | Red NExpo | |
| Blue X Binning | Red X Binning | Not typically adjusted in sequence iterator |
| Blue Y Binning | Red Y Binning | Not typically adjusted in sequence iterator |
| Blue CCD Readout | Red CCD Readout | |
The Sequence Iterator is comprised of 3 main section: The Available Items, Iteration Configuration, and Entry Field(s).
- The Available Items include configurable Instrument and Readout items present in the Instrument Element.
- The Iteration Configuration section is intended to show changes to the Instrument and Readout Configurations.
- Entry Fields allow the user to change the Instrument and Readout fields shown in the Iteration Configuration.
There are action buttons located to the right of the Iteration Configuration that allow the user to manipulate the order of the items in the configuration. The Buttons in the Bottom right allow the user to add and remove aspects of the configuration or steps all together.
Although there are a large number of items available in the Available Items menu for the user to configure, typically the user will only use a select few. The FPU Mask is typically only adjusted when performing a spectroscopic acquisition. The grating and binning is typically not adjusted beyond the initial instrument configuration. If you desire to change these parameters for any reason, please consult with your assigned ISA.
Example with MODS1 Sequence Iterator
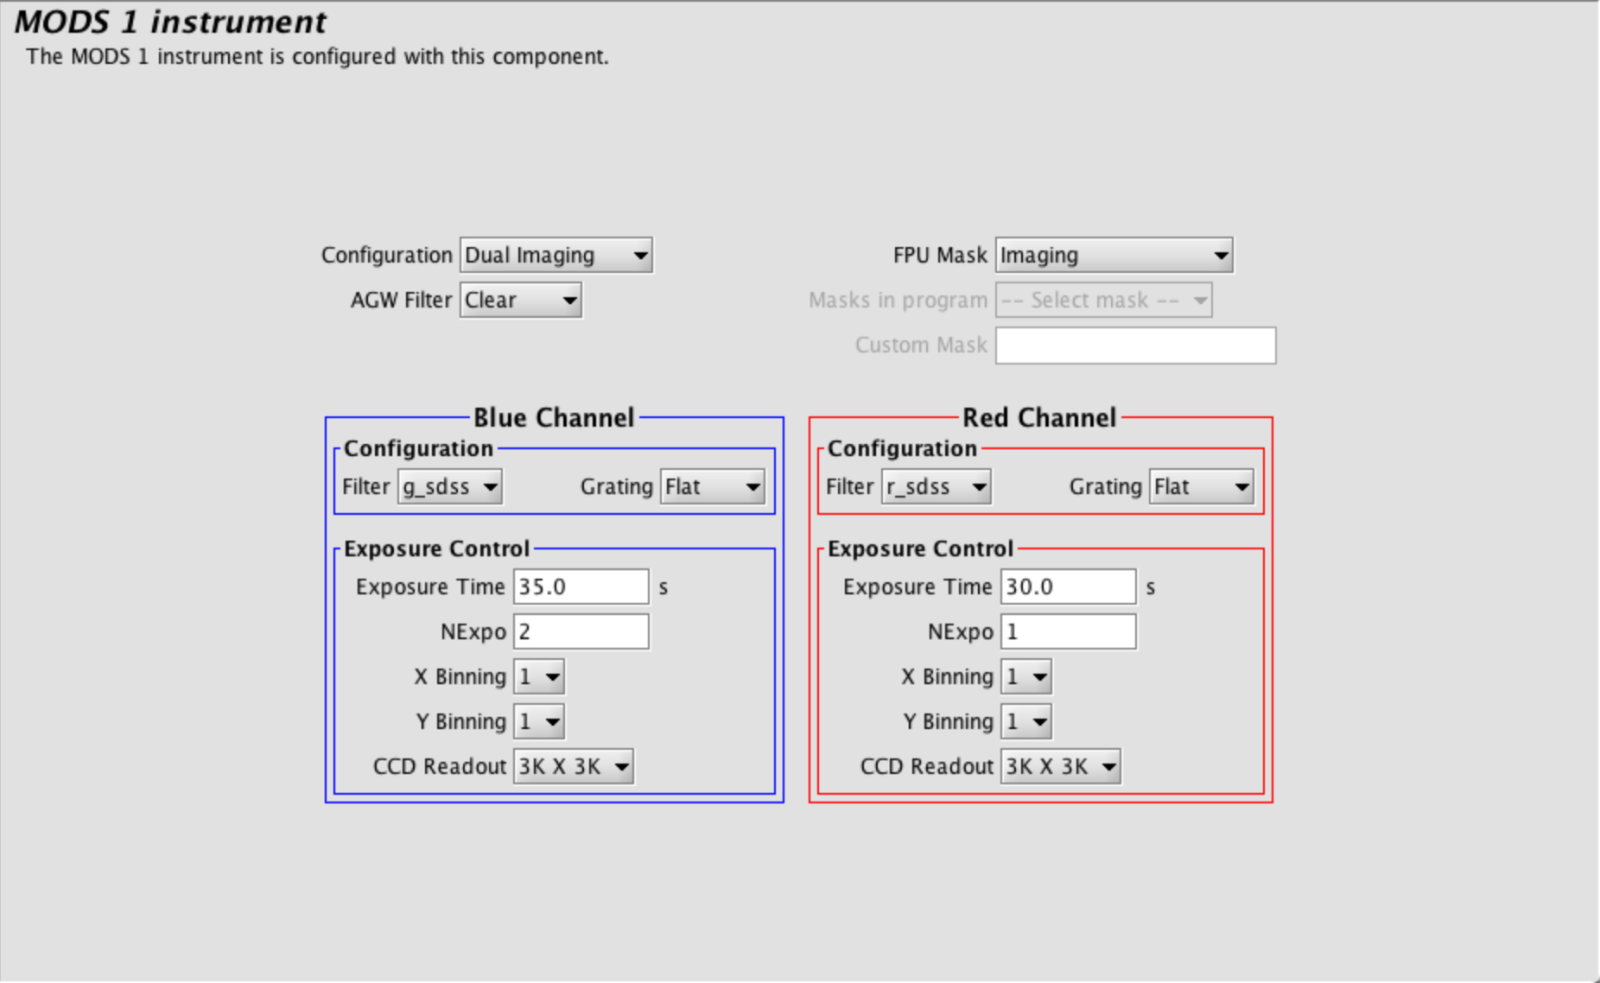
In this example we will configure MODS1 to take exposures in several filters with both the Red and Blue Camera. Assume the initial Configuration, as set in the Instrument Element, is as follows:
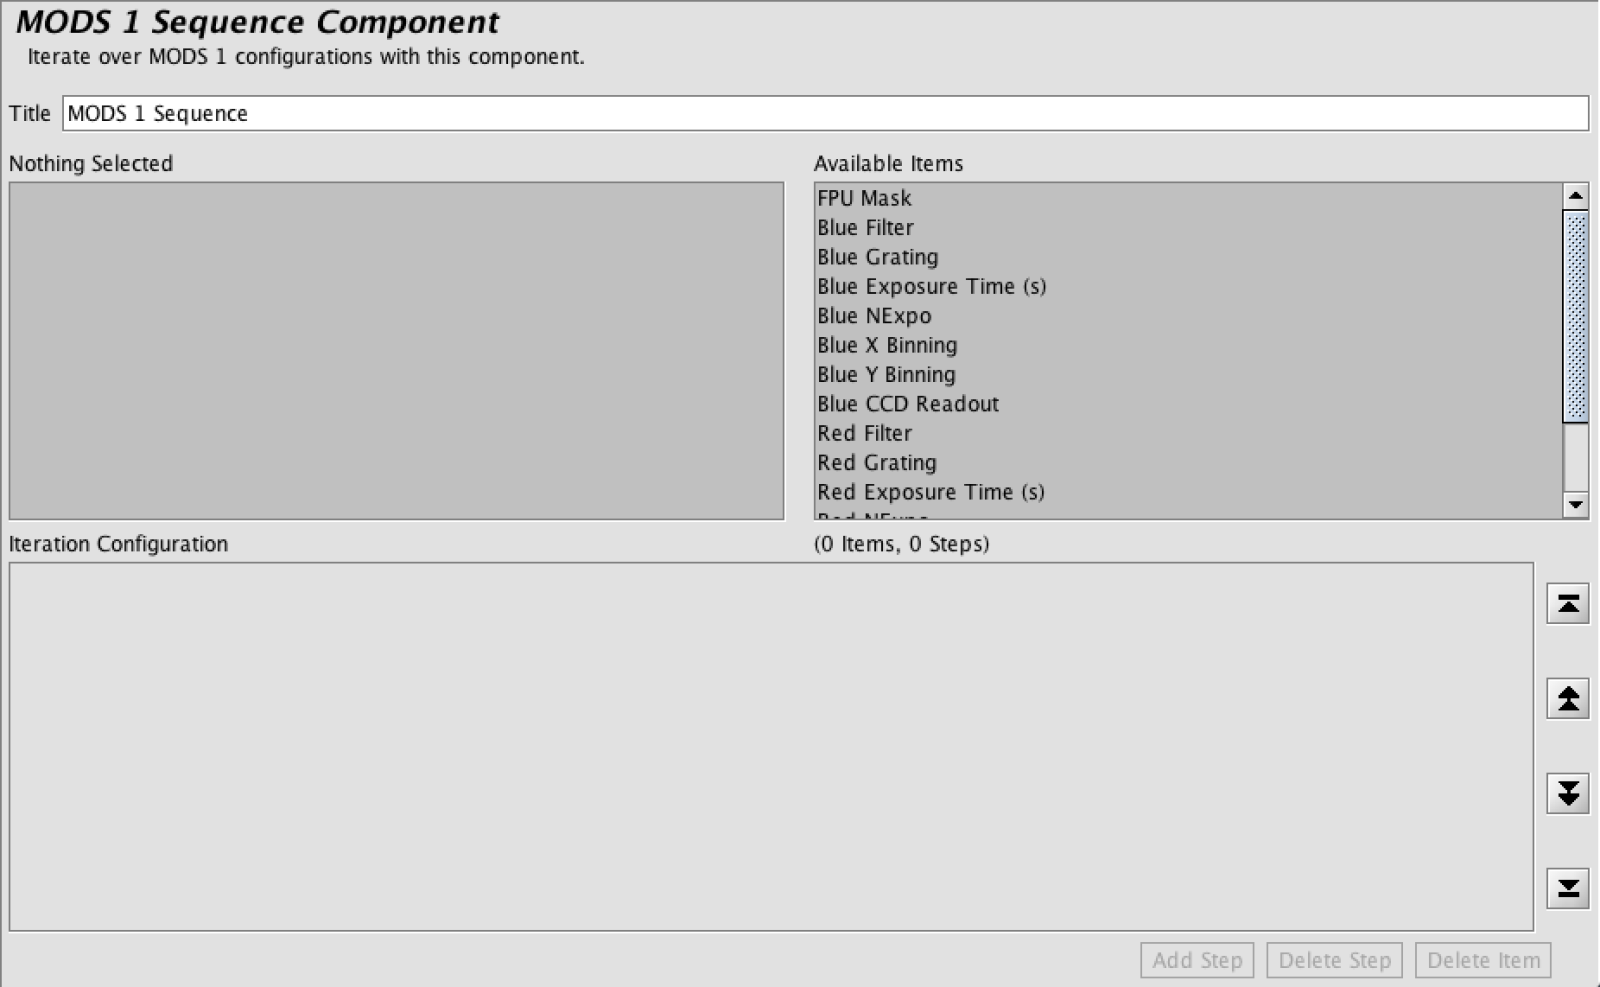
- We start by adding a MODS Sequence Iterator using the Iterator Button on the Left Sidebar to an already existing MODS1 observation. At first, we will have a completely blank MODS1 Sequence Iterator:
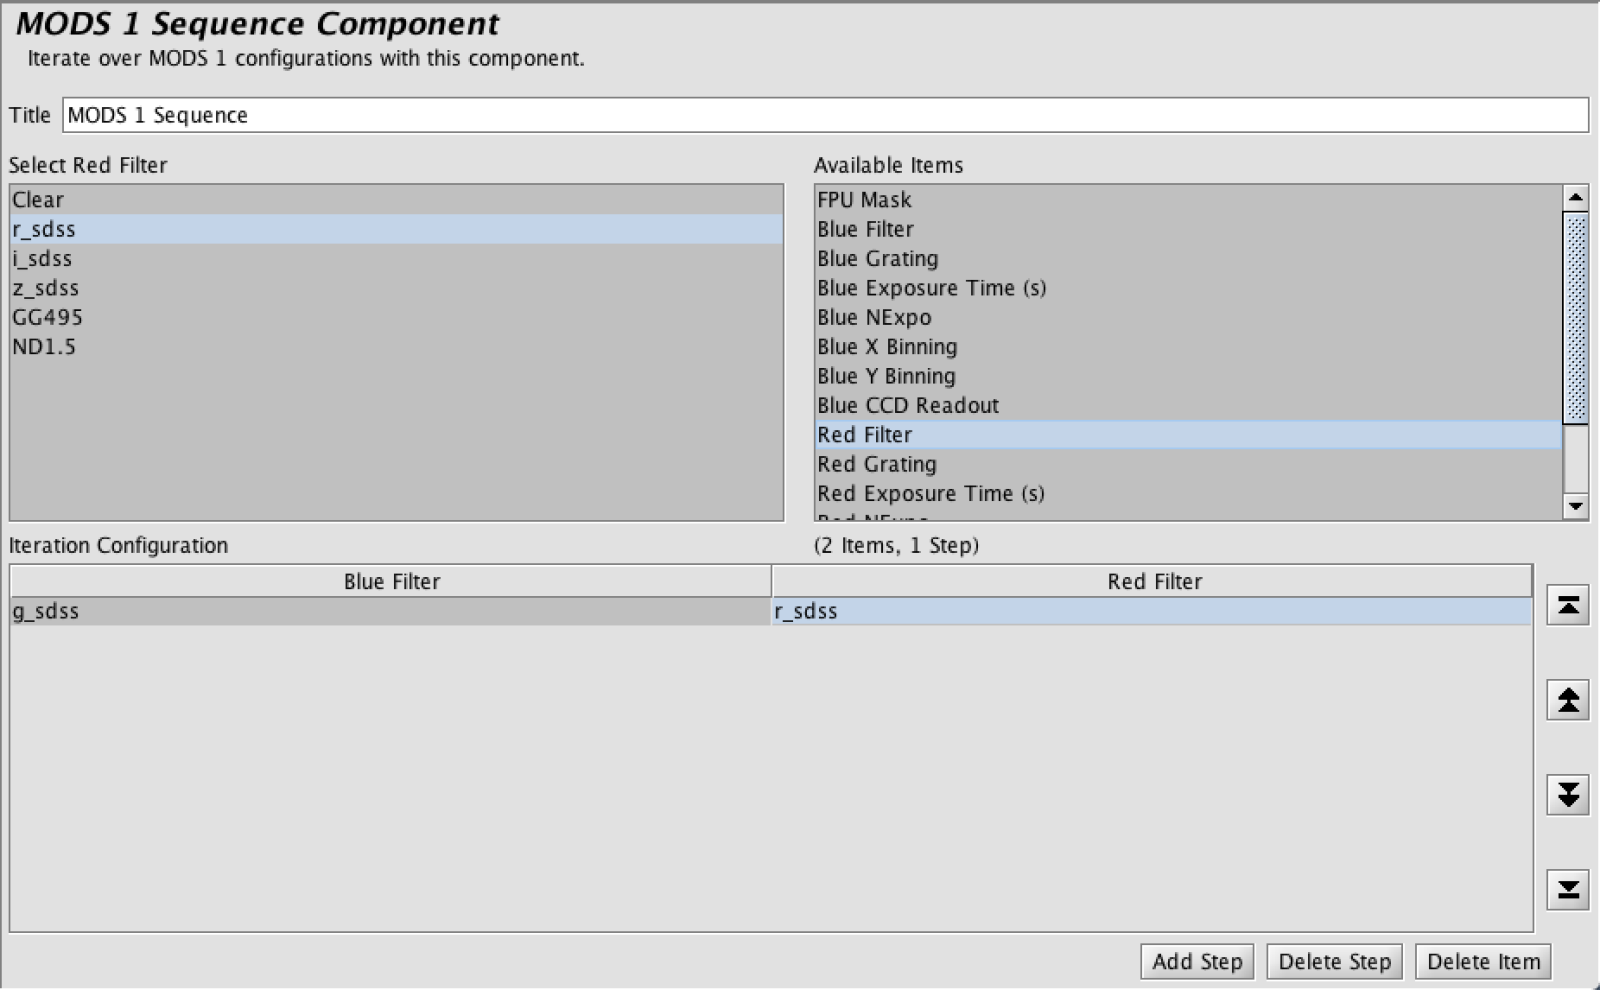
- In Available Items Click on Blue Filter. A list of filters will display in the Entry Field(s); the filter auto-selected will match the blue filter you specified in the initial instrument configuration completed in the MODS Instrument Element. This field will now be displayed in the Iteration Configuration. In Available Items Click on Red Filter. A list of filters will display; the filter auto-selected will also match the red filter you specified in the initial instrument configuration. The Red Filter will also now display in the Iteration Configuration.
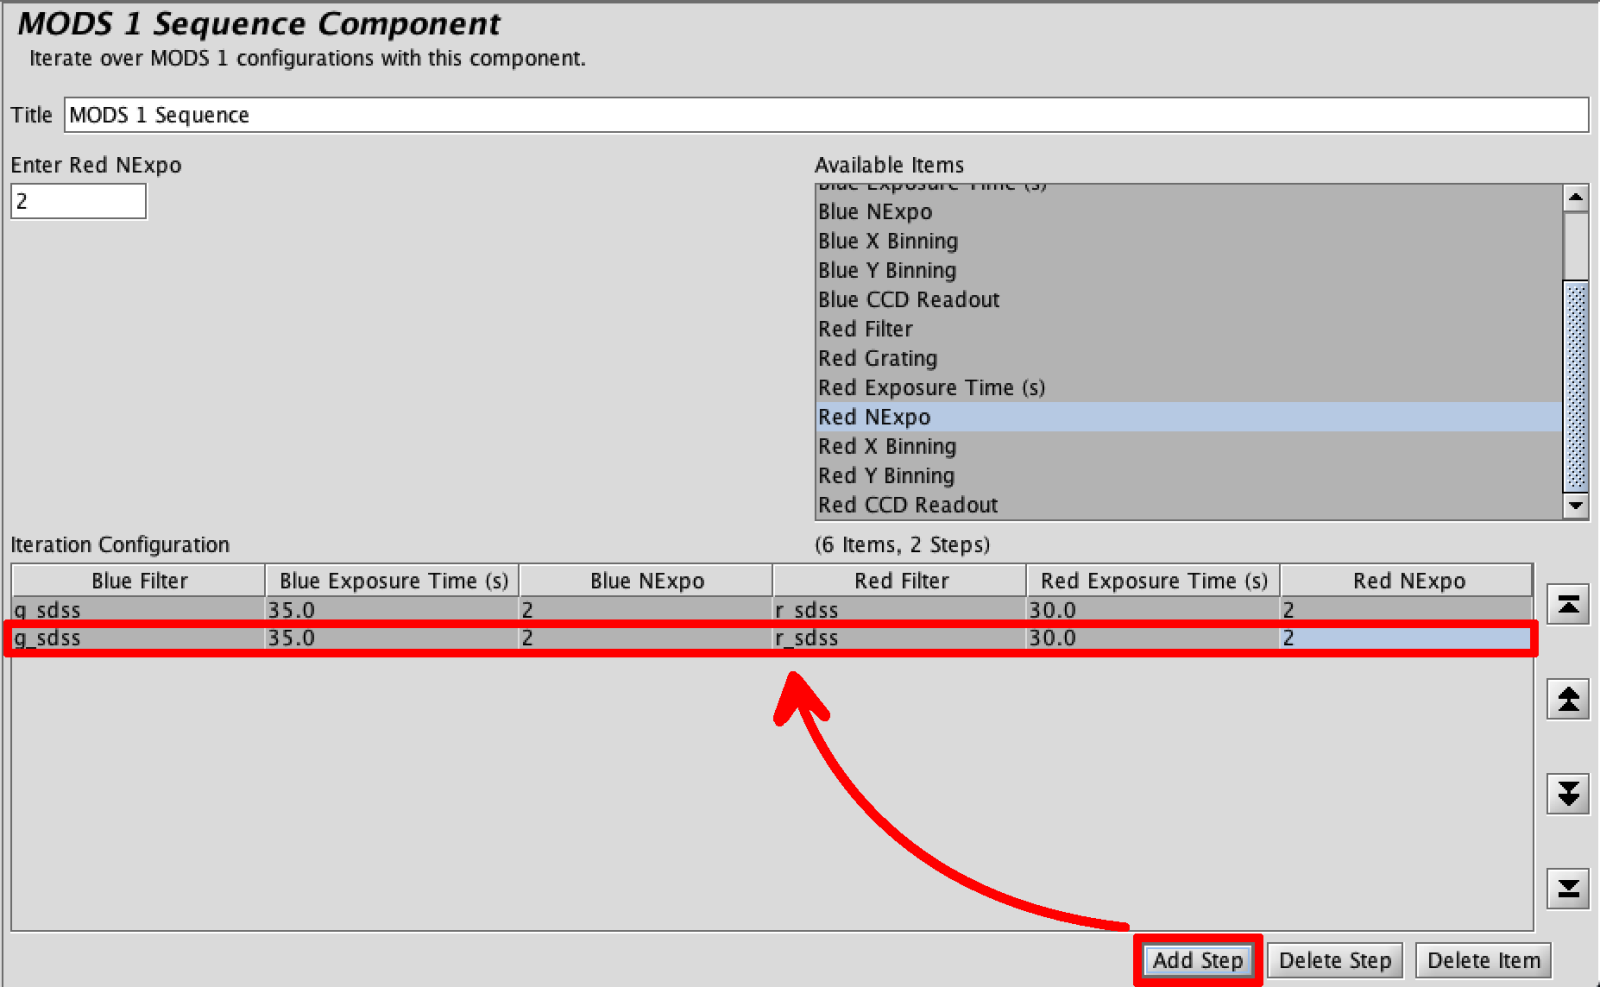
Pro Tip: If you change any configuration in the first line (step) of this iterator, that item will change in the MODS Instrument Element to reflect the new value. For instance If your initial blue filter was g_sdss and you click on u_sdss in the Sequencer, the MODS Instrument Element would now have u_sdss as the filter selection. - Other we will like to view are exposure time and number of exposures as these may change as we progress through our sequence. Select “Blue Exposure Time(s)”. This field will now show in the Iteration Configuration. There will also appear a field where the exposure time can be adjusted. As with the Filters, if this is adjusted at this point, it will change the exposure time in the Instrument Element. Repeat the process for “Red Exposure Time(s)”, “Blue NExpo”, and “Red NExpo”. For this example, we have adjusted the Red NExpo from 1 to 2.
- Now add a step using the action buttons located at the bottom right. Click “Add Step”. This will generate a setup identical to the one above.
-
Change elements of the added step by selecting the desired item in the Iteration Configuration. When the item is selected in the Iteration Configuration then a corresponding Entry Field will appear. To change the Blue Filter from g_sdss in step 2 to u_sdss, select g_sdss. Then from the corresponding Entry Field select the desired filter.
Adjusting the Red filter in the second step from r_sdss to i_sdss.
- If we want our third step to be an exposure with the Red Camera only with the z_sdss filter: Click “Add Step”. Adjust the Red Filter in the 3rd step but selecting the Red Filter in the Iteration Configuration. From the Entry Field filter list, select z_sdss,
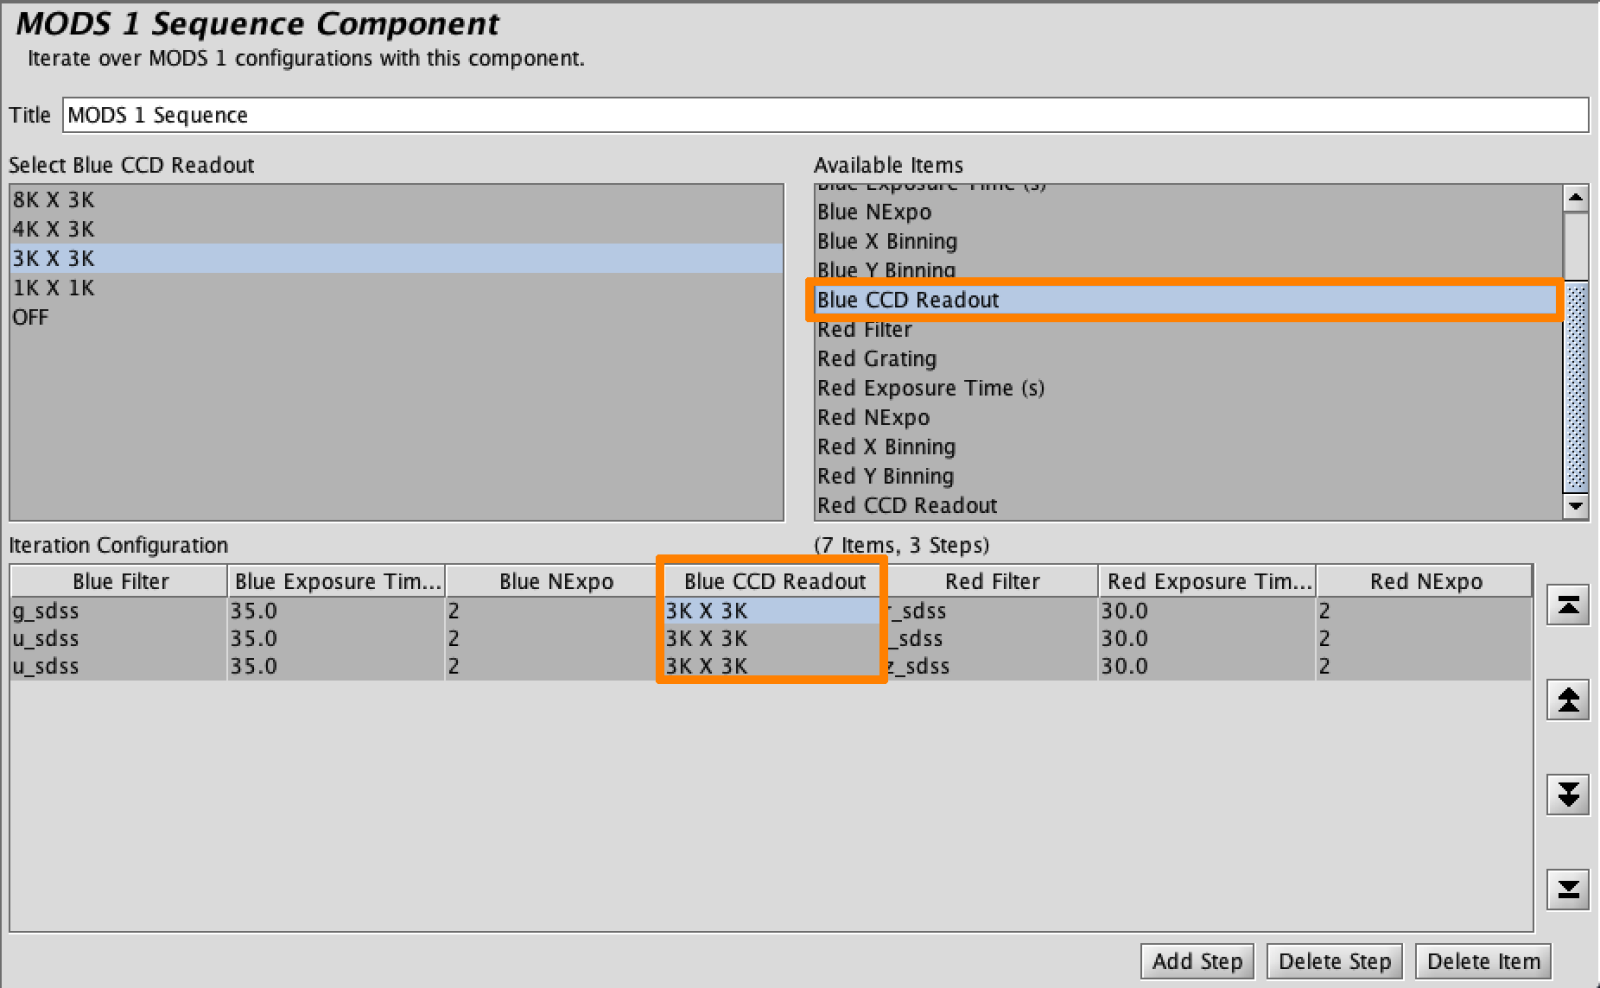
If we do not want an exposure on the blue side, but opt to run the red exposure only (command red go), we do this by turning the CCDReadout for blue off. This physically does nothing to the CCD, but is a place holder when writing scripts. To do this, add the column to the Iteration Configuration by selecting “Blue CCD Readout” from the Available Items.
Select the Blue CCD Readout in the third Iteration Configuration and select OFF. This will ensure that only the red side is done.
If this is not what we wanted to do, we could change the Item back, or just Delete the Item with the Action Button at the Bottom. This will keep the item as set in the Instrument Element and deletes column in the Iteration Configuration as the Iteration Configuration is intended to show changes to the instrument or readout.


