MODS Instrument Element
The MODS Instrument Elements are relatively straightforward. The MODSs have a set number of basic configurations and within each of these standard operating modes, MODS has default instrument configurations.
It is important to note that the Instrument Component Element only allows the user to specify the initial configuration of the instrument. If the user would like to cycle through filters, change exposure times, etc. this must be done through the MODS Sequence Iterator, which allows iteration through several configuration with in an observing sequence.
MODS1 and MODS2 Instrument Element
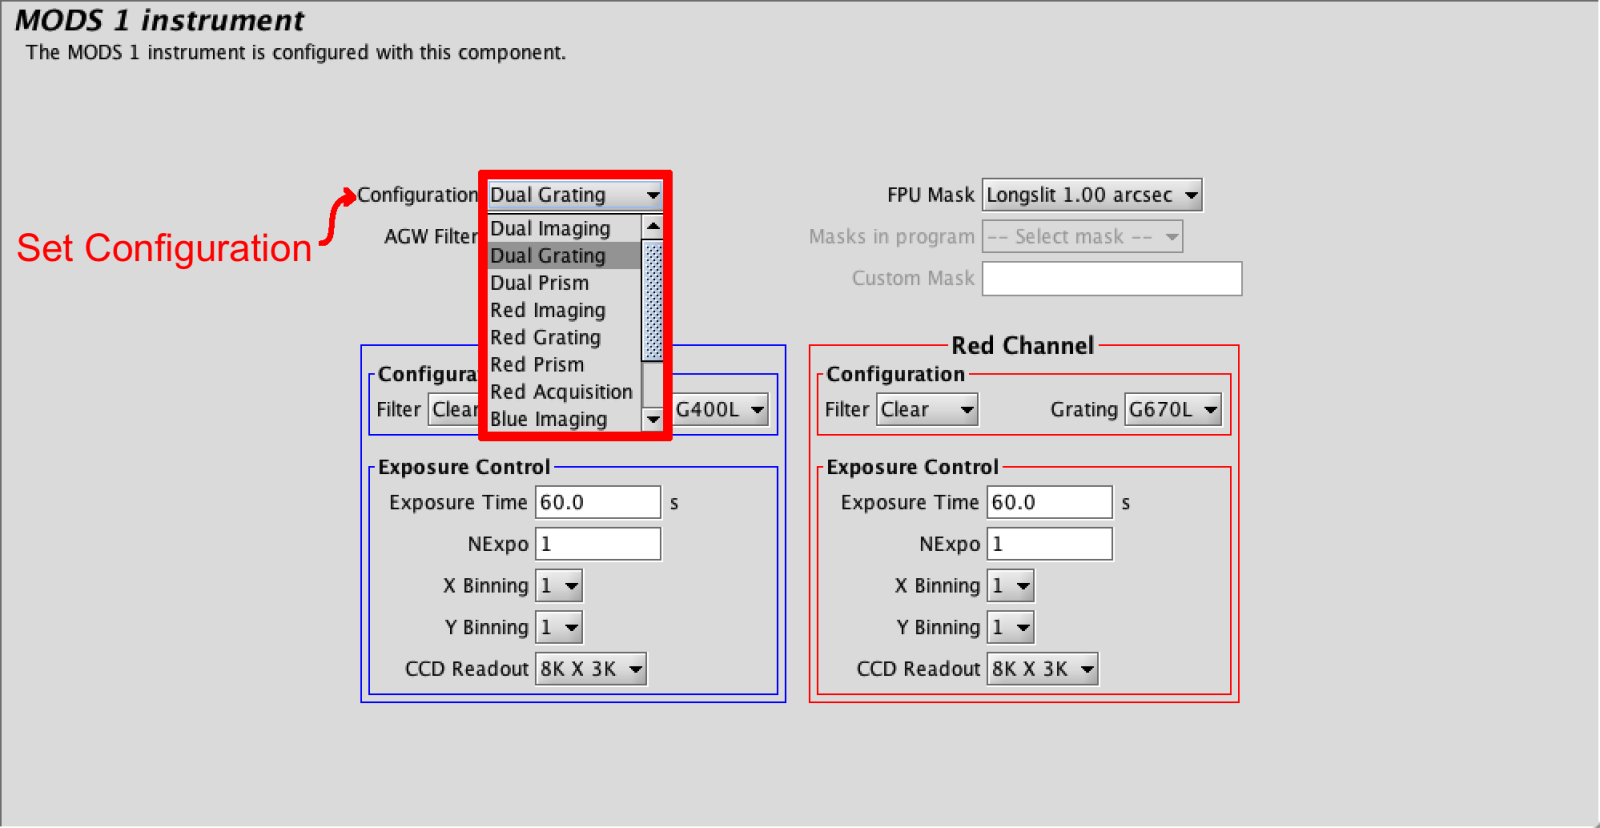
There are four basic operating modes: acquisition, imaging, grating spectroscopy, and prism spectroscopy. Within in each mode, MODS may be configured for dual-channel (red+blue), blue-only, and red-only operation. So the total number of Configurations (mode plus channel) is 11. The configuration is set from the Configuration dropdown menu.
Each configuration selected will auto-populate grating, filter and CCD Readout fields with default configurations, summarized in the table below:
| Configuration | Active Channel | Grating | Filter | CCD Readout |
| Dual Grating | Red | G670L | Clear | 8K x 3K |
| Blue | G400L | Clear | 8K x 3K | |
| Red Grating | Red | G670L | GG495 | 8K x 3K |
| Blue Grating | ||||
| Blue | G400L | Clear | 8K x 3K | |
| Dual Prism | Red | P700L | GG495 | 4K x 3K |
| Blue | P450L | Clear | 4K x 3K | |
| Red Prism | Red | P700L | GG495 | 4K x 3K |
| Blue Prism | ||||
| Blue | P450L | Clear | 4K x 3K | |
| Dual Imaging | Red | flat | SDSSr, SDSSi, SDSSz |
3K x 3K |
| Blue | flat | SDSSg, SDSSu |
3K x 3K | |
| Red Imaging | Red | flat | SDSSr, SDSSi, SDSSz |
3K x 3K |
| Blue Imaging | ||||
| Blue | flat | SDSS g, SDSS u |
3K x 3K | |
| Red Acquisition | Red | flat | SDSSr, SDSSi, SDSSz |
1K x 1K |
| Blue Acquisition | ||||
| Blue | flat | SDSSg, SDSSu |
1K x 1K |
For example, Setting a configuration of Red Grating will grey out the blue channel, it will set the G670L grating on the Red side with the GG495 order sorting filter, and set the Red CCD Readout to 8K x 3K:

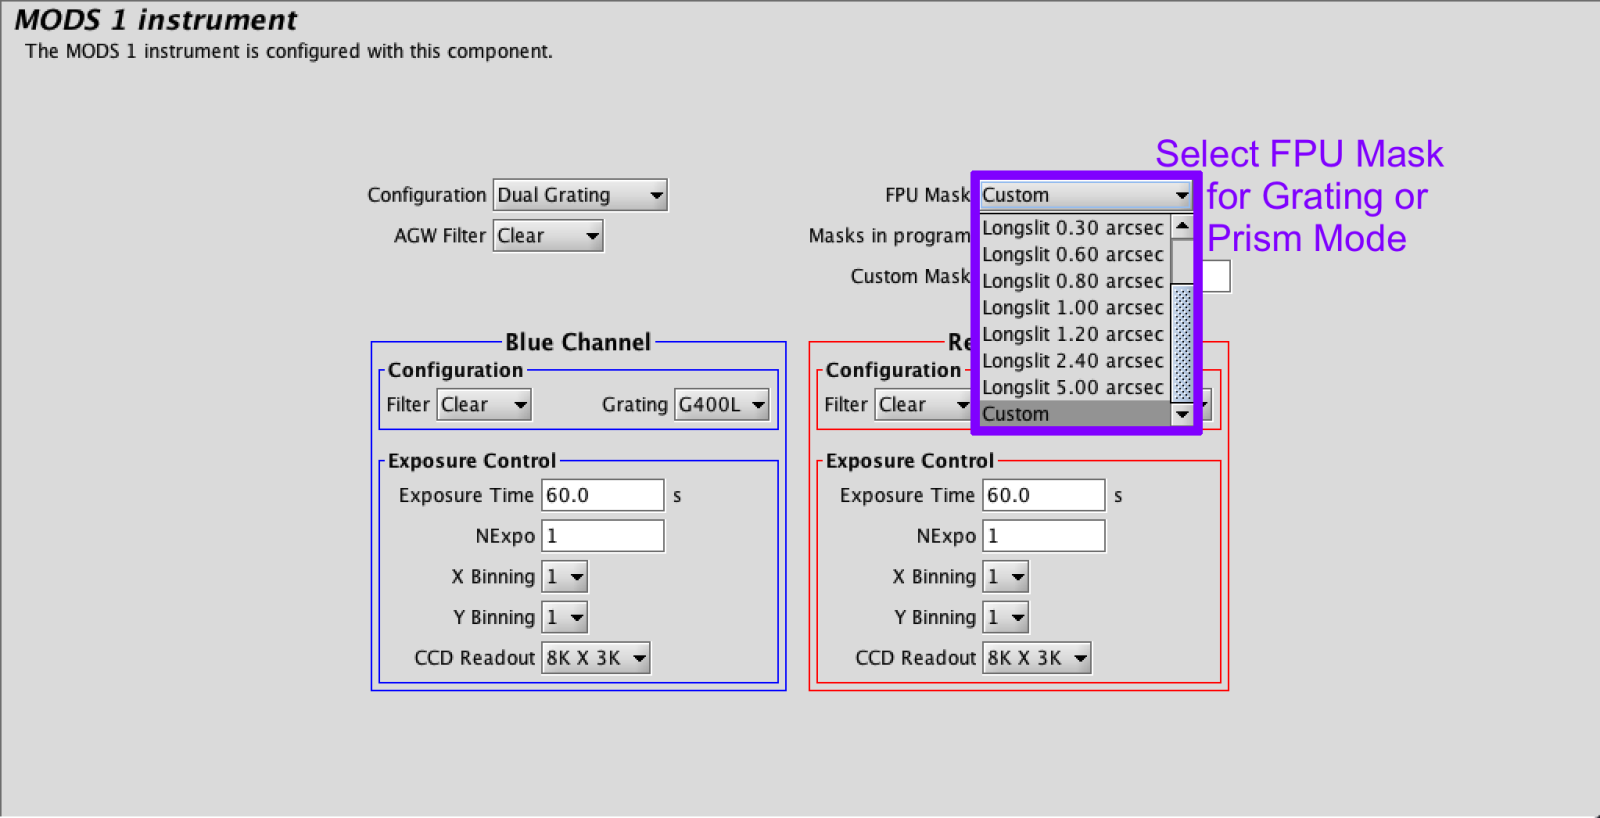
If using grating or prism modes, next the user will need to insert an appropriate long-slit or custom user mask in the FPU Mask field.

If using a custom mask, Select Custom from the FPU drop down menu and load the MMS File by hitting the Load MMS File button on the right. When an MMS File is uploaded, the MMS file information can be used to populate the Target Element of the observation after a prompt to the user is confirmed.
 |
|
|
 |
Enter the desired initial exposure time and number of exposures in appropriate nodes in the associated channel. The default binning is set to 1×1 but this can be adjusted as well. All parameters set in the Instrument Element will propagate to future sequence elements unless changed in the sequence. See MODS Sequence Iterator for details on adjusting elements beyond the initial configuration.


